
Decorating your home doesn’t have to break the bank. With a little creativity and some handy tools, you can create stylish DIY decor pieces that look high-end but cost a fraction of the price.
Whether you’re revamping your living space or adding a touch of charm to a specific room, this guide will provide inspiration and actionable tips to make your DIY journey both fun and rewarding.
Why DIY Decor?
DIY decor offers several benefits beyond cost savings:
- Customization: Tailor designs to your style and needs.
- Sustainability: Repurpose and recycle items, reducing waste.
- Satisfaction: Enjoy the pride of creating something with your own hands.
Essential Tools and Supplies
Before diving into DIY decor projects, make sure you have the basics:
- Hot glue gun
- Paintbrushes and acrylic paints
- Sandpaper
- Craft knife or scissors
- Measuring tape
- Decorative items (fabrics, beads, stencils, etc.)
For specific projects, you might need additional materials like wood planks, mason jars, or spray paint. Always start with a clear plan and gather everything beforehand.
Top 5 DIY Decor Ideas
1. Turn Mason Jars into Chic Storage Containers
Transform plain mason jars into stylish storage for kitchen supplies, bathroom essentials, or office stationery.
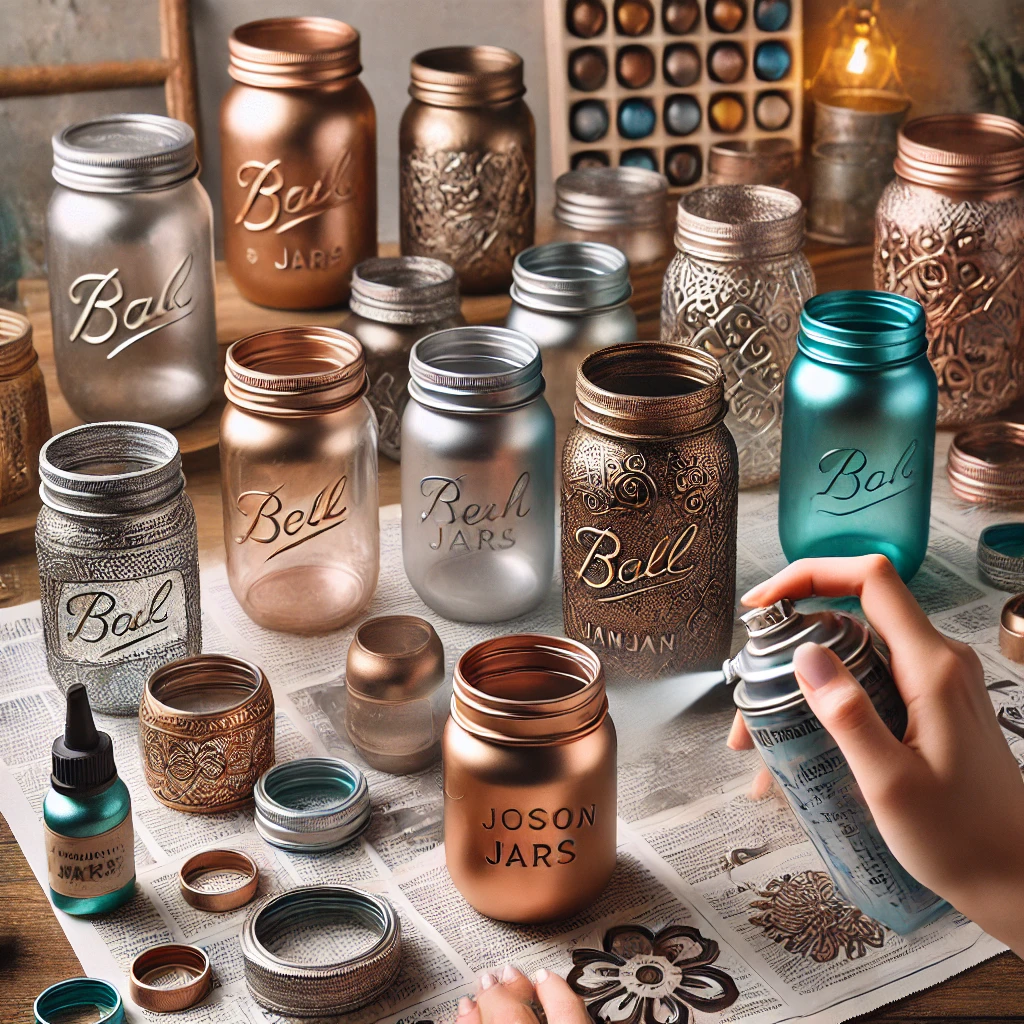
Paint jars with matte or metallic spray paint.
Add labels or stenciled designs for a personalized touch.
Use decorative knobs as lids for added flair.
Budget-Friendly Tip: Use leftover jars from grocery items like pasta sauces or pickles.
Steps:
Clean the Jars:
Wash the jars thoroughly to remove any residue.
Let them dry completely.
Prep for Painting:
Use painter’s tape or stencils to mark areas you want to leave clear or add designs.
Place the jars on a newspaper or drop cloth in a well-ventilated area.
Spray Paint:
Apply an even coat of matte or metallic spray paint to each jar.
Let the jars dry for 30 minutes, then apply a second coat if needed.
Decorate:
Use stencils to add designs with a contrasting paint color.
Glue decorative knobs to the lids if you’re using them.
Add Labels:
Attach labels or tags to the jars for a functional and stylish finish.
Display:
Use the jars to store kitchen utensils, craft supplies, or bathroom essentials. Arrange them neatly on a shelf or counter.
2. DIY Wall Art with Abstract Paintings
Wall art can instantly elevate a room, and creating your own ensures a unique touch.
Choose a canvas or repurpose an old frame.
Experiment with abstract designs using a palette knife or sponge.
Highlight your art with metallic accents or contrasting colors.
Pro Tip: Use sample paint pots from hardware stores to save on costs.
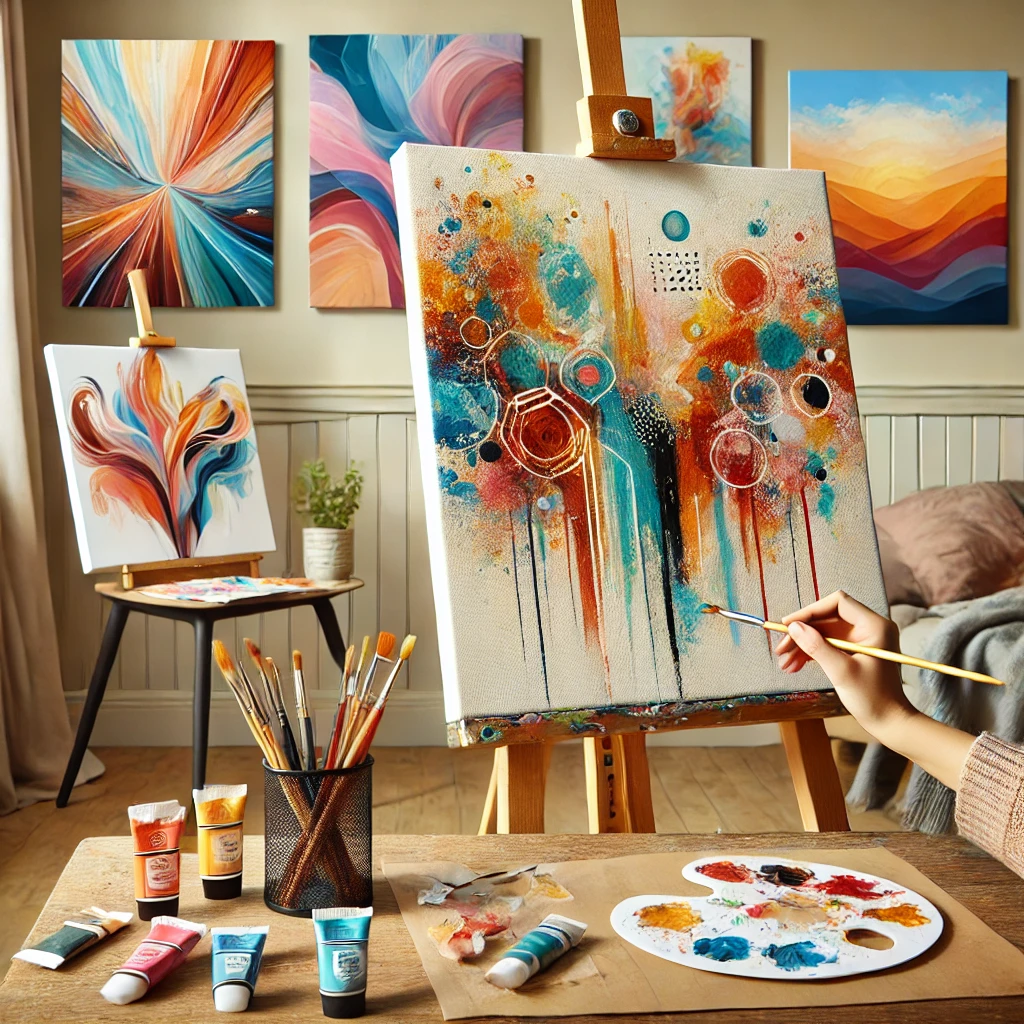
Apply Base Layers:
Use sponges or brushes to create a base layer with broad strokes or washes of color. Let this layer dry for about 20 minutes.
Add Texture and Patterns:
Use a palette knife to apply paint in bold, textured strokes. Experiment with blending and layering colors to create depth.
Refine the Design:
Use painter’s tape to block out sections for geometric patterns, or freehand abstract designs. Add highlights with metallic or contrasting colors.
Allow to Dry:
Let the artwork dry completely before handling or hanging.
Display:
Frame your painting or hang it directly on the wall to add a pop of creativity to your space.
3. Repurpose Wooden Crates for Storage or Shelves
Old wooden crates can be sanded, painted, and stacked to create stylish shelving units.
Sand the crates to smooth out rough edges.
Apply wood stain or paint to match your decor.
Secure them together with screws for stability.
Budget-Friendly Tip: Look for free crates at local markets or grocery stores.
Steps:
Prepare the Crates:
Clean the crates thoroughly to remove dust or dirt.
Sand the surfaces until smooth to avoid splinters.
Apply Paint or Stain:
Choose a color or stain that complements your decor.
Use a paintbrush to apply an even coat and let it dry for 1-2 hours. Repeat if necessary.
Arrange the Design:
Stack and arrange the crates in your desired layout (vertical, horizontal, or staggered).
Use a measuring tape to ensure proper alignment.
Secure the Crates:
Drill screws through adjoining crates to fix them securely.
Use extra screws to anchor the unit to a wall if needed for stability.
Decorate the Shelves:
Place books, plants, or decor items inside the crates to create a stylish display.
Final Touch:
Add felt pads to the bottom if placing on a hard floor to prevent scratches.
4. Fabric-Covered Flower Pots
Add personality to your plants by covering plain terracotta pots with fabric scraps.
Cut fabric to size and glue it around the pot.
Seal with a waterproof adhesive for durability.
Sustainability Note: Use leftover fabric from old clothes or linens.
Steps:
Prepare the Pot:
Clean and dry the terracotta pot to remove any dirt or dust.
Cut the Fabric:
Measure and cut fabric pieces to fit snugly around the pot, leaving an inch for overlap.
Apply Glue:
Use a brush to spread fabric glue evenly across the pot’s surface.
Wrap the Fabric:
Smoothly wrap the fabric around the pot, aligning edges. Press out any bubbles or wrinkles.
Finish the Edges:
Fold the fabric at the bottom and top edges for a neat look, securing with glue.
Seal the Fabric:
Apply a thin coat of glue over the fabric to strengthen and protect it from fraying.
Let It Dry:
Allow the pot to dry completely for at least 2-3 hours.
Optional Waterproofing:
For outdoor use, coat the finished pot with a waterproof sealant.
Plant and Display:
Add soil and your favorite plants, then arrange the pots in your garden, patio, or home.
5. Create a Statement Mirror with Rope or Wood Accents
Elevate a basic mirror with a DIY frame made from natural materials.
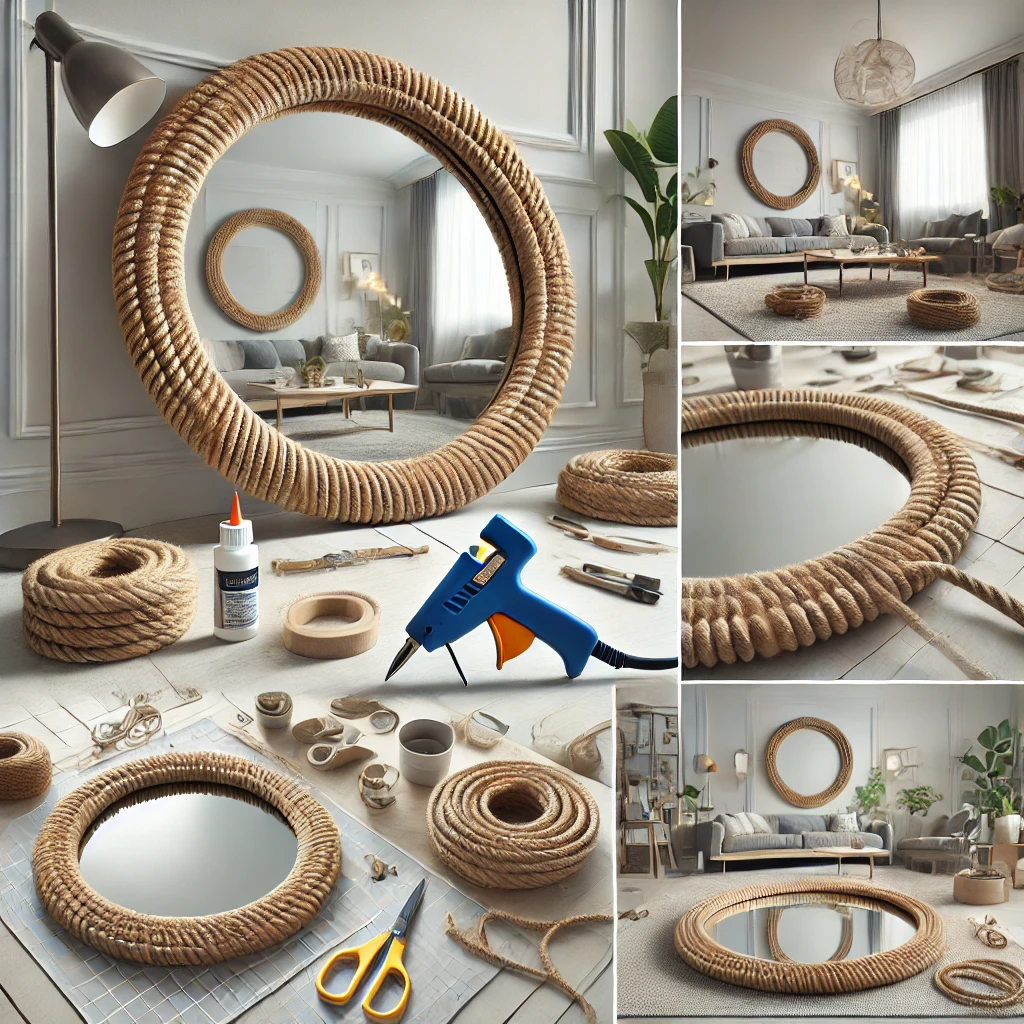
Steps:
Prepare the Mirror:
Clean the surface and edges of the frameless mirror to ensure the rope adheres properly.
Measure and Cut the Rope:
Measure the circumference of the mirror.Cut the rope to fit, leaving extra length for adjustments.
Glue the First Rope Layer:
Apply hot glue in small sections along the edge of the mirror.
Press the rope into the glue, ensuring a snug fit. Use clamps or heavy objects to hold the rope in place while drying.Add Additional Layers (Optional):
For a more dramatic look, add extra layers of rope by repeating the gluing process.
Experiment with patterns by layering different rope sizes or textures.
Secure the Ends:
Trim any excess rope and glue the ends firmly to prevent fraying.
Mount the Mirror:
Attach hooks or adhesive strips to the back of the mirror. Hang it securely on your desired wall.
Style Your Space:
Place the statement mirror in a well-lit area to reflect light and make your room feel more spacious.
- Budget-Friendly Tip: Find inexpensive mirrors at thrift stores.
Tips for a Successful DIY Decor Project
- Start Small: Choose easy projects to build confidence.
- Stay Patient: Allow time for paint or glue to dry fully for a polished look.
- Embrace Imperfections: Minor flaws add charm and uniqueness.
- Shop Smart: Look for deals at dollar stores, thrift shops, and garage sales.
Final Thoughts
With a little effort and creativity, DIY decor can make your home stylish and personal without the hefty price tag.
The best part? You’ll have pieces that tell a story and reflect your personality.
Whether you’re a seasoned DIY enthusiast or just starting out, these ideas will inspire you to create beautiful, budget-friendly decor that makes your space truly yours.